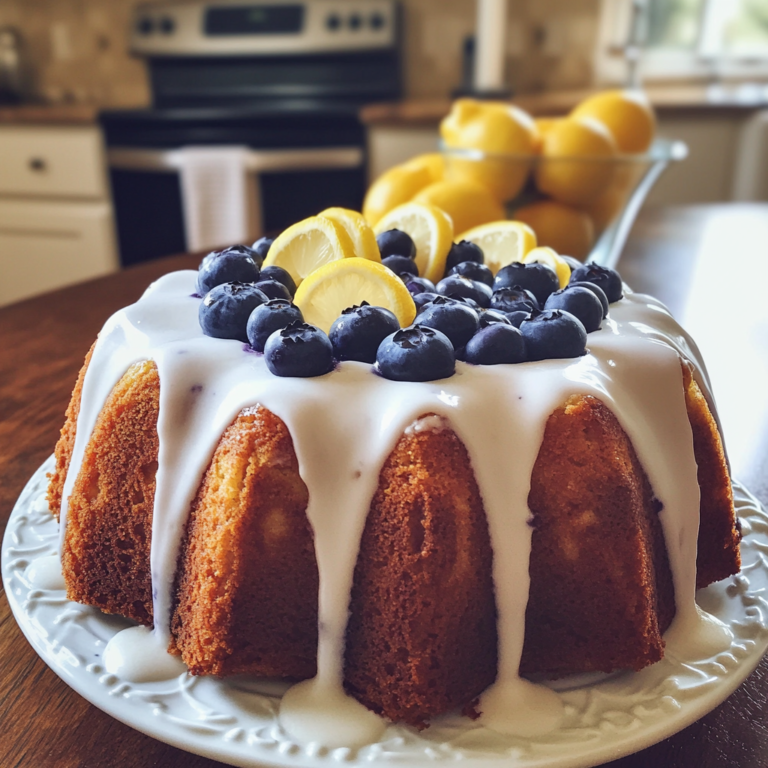
Decadent Red Velvet Lava Cupcakes

Imagine sinking your fork into a rich, velvety cupcake, only to reveal a luscious, molten chocolate center that oozes onto your plate like a sweet, indulgent surprise. That’s exactly what you get with these Decadent Red Velvet Molten Lava Cupcakes—a perfect combination of elegance and comfort in a single dessert. Whether you’re preparing a romantic treat for Valentine’s Day, impressing guests at a dinner party, or simply satisfying a chocolate craving, this recipe delivers in every way.
The red velvet cake is known for its deep, vibrant color and subtle cocoa flavor, while the molten lava center adds a whole new level of indulgence. The key to achieving the perfect texture is a well-balanced batter that’s moist and soft on the outside while keeping the chocolate filling irresistibly gooey inside.
What makes this recipe stand out from traditional lava cakes is its beautiful presentation and the combination of flavors—a hint of cocoa, the mild tang of buttermilk, and the richness of chocolate all come together in harmony. Plus, these cupcakes are baked in individual portions, making them perfect for serving at special occasions or just as a luxurious personal treat.
What You’ll Need to make Red Velvet Lava Cupcakes
Before we start baking, it’s essential to gather all the necessary ingredients and tools. The success of your red velvet molten lava cupcakes depends on using high-quality ingredients and following precise measurements. Here’s everything you’ll need:
Ingredients for the Red Velvet Cupcakes
- 1 ¼ cups (156g) all-purpose flour – The base of our cupcakes, providing structure.
- ¼ cup (25g) cocoa powder – Adds a rich, chocolatey depth to the red velvet batter.
- 1 teaspoon baking soda – Helps the cupcakes rise to a perfect fluffy texture.
- ½ teaspoon salt – Enhances all the flavors and balances the sweetness.
- ½ cup (113g) unsalted butter, softened – Brings moisture and richness to the cupcakes.
- ¾ cup (150g) granulated sugar – Sweetens the cupcakes without overpowering them.
- 2 large eggs – Helps with structure and gives the cupcakes a tender crumb.
- 1 teaspoon vanilla extract – Adds warmth and enhances the overall flavor.
- ½ cup (120ml) buttermilk – Keeps the cupcakes soft and gives them a signature tangy flavor.
- 1 teaspoon white vinegar – Reacts with baking soda to create a light and fluffy texture.
- 1 tablespoon red food coloring – Gives the cupcakes their classic red velvet look.
Ingredients for the Molten Lava Filling
- ½ cup (85g) semi-sweet chocolate chips or chopped chocolate – Creates the gooey, molten center.
- ¼ cup (60ml) heavy cream – Makes the chocolate filling smooth and creamy.
Tools You’ll Need
- Mixing bowls – To combine wet and dry ingredients separately before mixing.
- Electric mixer or whisk – To ensure the batter is well-blended.
- Muffin tin and cupcake liners – To shape and bake the cupcakes evenly.
- Small saucepan – For melting the chocolate filling.
- Cooling rack – Allows cupcakes to cool properly before serving.
Now that we have all our ingredients and tools ready, it’s time to start baking! In the next section, we’ll go step by step through the process of making these irresistible red velvet molten lava cupcakes.

How to Make Red Velvet Lava Cupcakes
Creating these Decadent Red Velvet Molten Lava Cupcakes requires precision, but don’t worry! Follow this step-by-step guide, and you’ll achieve bakery-quality results at home.
Step 1: Prepare the Chocolate Lava Filling
- Melt the Chocolate: In a small saucepan over low heat, warm ½ cup (85g) of semi-sweet chocolate chips with ¼ cup (60ml) of heavy cream, stirring constantly until smooth.
- Chill the Filling: Transfer the melted chocolate into a small bowl, let it cool slightly, then place it in the freezer for about 30 minutes or until firm enough to scoop.
Step 2: Preheat and Prepare the Cupcake Batter
- Preheat the Oven: Set your oven to 350°F (175°C) and line a muffin tin with cupcake liners.
- Mix Dry Ingredients: In a medium bowl, whisk together 1 ¼ cups (156g) all-purpose flour, ¼ cup (25g) cocoa powder, 1 teaspoon baking soda, and ½ teaspoon salt.
- Cream the Butter and Sugar: In a separate large mixing bowl, beat ½ cup (113g) softened unsalted butter with ¾ cup (150g) granulated sugar until light and fluffy.
- Add Wet Ingredients: Beat in 2 eggs, one at a time, then mix in 1 teaspoon vanilla extract, 1 tablespoon red food coloring, and 1 teaspoon white vinegar.
- Incorporate Buttermilk and Dry Ingredients: Gradually add the dry ingredients, alternating with ½ cup (120ml) buttermilk, until everything is combined.
Step 3: Assemble and Bake
- Fill the Cupcake Liners: Spoon one tablespoon of batter into each cupcake liner.
- Add the Chocolate Center: Remove the chilled chocolate filling from the freezer and scoop a small teaspoon of chocolate into the center of each cupcake.
- Cover with More Batter: Spoon more red velvet batter over the chocolate, filling each liner about ¾ full.
- Bake to Perfection: Place in the oven and bake for 16–18 minutes, or until the tops are set but the centers remain slightly soft.
- Cool Before Serving: Let the cupcakes cool in the pan for 5 minutes, then transfer them to a cooling rack.
Now, your cupcakes are ready to be enjoyed with a warm, gooey center!

Serving and Storage Tips for Red Velvet Lava Cupcakes
These Red Velvet Molten Lava Cupcakes are best served fresh, but with the right techniques, you can store them while keeping their rich flavor and texture intact.
How to Serve for the Best Experience
- Serve Warm: The molten center is at its best when the cupcakes are slightly warm. If they have cooled completely, heat them in the microwave for 10–15 seconds before serving.
- Pairing Suggestions: These cupcakes pair wonderfully with a scoop of vanilla ice cream, a drizzle of chocolate sauce, or fresh berries.
- Add a Topping: For extra elegance, dust them with powdered sugar, pipe a swirl of cream cheese frosting, or add a dollop of whipped cream.
How to Store Your Cupcakes
- Room Temperature: If consuming within a day, keep them in an airtight container at room temperature for up to 12 hours.
- Refrigeration: Store in an airtight container in the fridge for up to 3 days. Let them sit at room temperature for about 30 minutes before serving or reheat slightly for the molten effect.
- Freezing: Wrap each cupcake individually in plastic wrap and place them in a freezer-safe container. They can be frozen for up to 2 months. To serve, thaw at room temperature and warm in the microwave for 15–20 seconds.
By following these tips, you can enjoy your Red Velvet Molten Lava Cupcakes anytime, whether freshly baked or saved for later!

Mistakes to Avoid for Red Velvet Lava Cupcakes
Even though these Red Velvet Molten Lava Cupcakes are relatively simple to make, a few common mistakes can impact their texture, flavor, and that perfect molten center. Avoid these pitfalls to ensure the best results!
1. Overbaking the Cupcakes
One of the biggest mistakes when making molten lava cupcakes is baking them for too long. If overbaked, the gooey center will solidify, turning them into regular red velvet cupcakes rather than lava cakes.
How to Avoid:
- Keep a close eye on the oven and bake for 16–18 minutes maximum.
- The tops should be set but slightly soft in the center.
- If unsure, remove one cupcake and check—if it’s completely firm in the center, it’s overbaked.
2. Using Cold or Hard Chocolate for the Filling
The key to the perfect lava center is soft, melted chocolate inside the cupcake. If you place a chocolate chunk directly in the batter without pre-melting or chilling the filling properly, it may not create the desired molten texture.
How to Avoid:
- Make sure to melt the chocolate with heavy cream and let it chill slightly before scooping it into the batter.
- This method creates a soft and creamy lava effect instead of an underwhelming chocolate chunk.
3. Not Properly Measuring Ingredients
Baking is a science, and even small deviations in measurements can affect the texture of your cupcakes. Using too much flour can make them dry, while too much liquid can make them overly dense.
How to Avoid:
- Use a kitchen scale for accuracy.
- If using measuring cups, spoon and level your flour rather than scooping it directly from the bag (this prevents packing in too much flour).
4. Skipping the Vinegar or Buttermilk
Red velvet cupcakes get their unique flavor and soft texture from vinegar and buttermilk, which react with baking soda to create a light and fluffy crumb. Leaving them out will result in a dry or dense cupcake.
How to Avoid:
- Don’t skip or substitute these ingredients unless necessary.
- If you don’t have buttermilk, make a quick alternative by adding ½ tablespoon of lemon juice or white vinegar to ½ cup of milk and letting it sit for 5 minutes.
5. Not Allowing the Cupcakes to Cool Slightly Before Serving
While you want to enjoy the cupcakes warm, cutting into them too soon may cause them to fall apart completely.
How to Avoid:
- Let them cool for about 5 minutes in the pan before transferring to a rack.
- If they need reheating, microwave for just 10–15 seconds to bring back the molten texture.
Avoiding these common mistakes will help you achieve the perfect balance of soft cake and gooey lava center every time!

Tips and Tricks for Red Velvet Lava Cupcakes
To take your Red Velvet Molten Lava Cupcakes to the next level, here are some expert baking tips that will enhance the flavor, texture, and overall experience of making these treats.
1. Use High-Quality Chocolate for the Best Lava Effect
Since the molten center is a key feature of this recipe, using good-quality chocolate makes a huge difference. Instead of basic chocolate chips, opt for:
- Premium baking chocolate (60-70% cocoa) for a deep, rich flavor.
- Couverture chocolate for a smoother, silkier melt.
- If using chocolate chips, choose semi-sweet or dark chocolate rather than milk chocolate, which can be too sweet.
2. Adjust the Food Coloring for a Natural Option
Traditional red velvet cake gets its vibrant hue from red food coloring, but if you prefer a more natural alternative, try:
- Beet powder or beet puree – Adds color without altering flavor.
- A smaller amount of food coloring – You don’t need a whole tablespoon; even ½ teaspoon can enhance the red tint.
3. Experiment with Fillings for a Twist
While classic chocolate lava is irresistible, you can also try different fillings for variety:
- White chocolate ganache for a creamy contrast.
- Nutella or peanut butter for a nutty twist.
- Salted caramel for a sweet and salty combination.
4. Make the Cupcakes Ahead for Convenience
If baking for an event, you can prep the cupcakes in advance:
- Prepare the batter and store it in the fridge for up to 24 hours before baking.
- Make the chocolate lava filling ahead of time and keep it chilled until needed.
- Freeze baked cupcakes (without frosting) and reheat before serving.
5. Add a Surprise Garnish for a Beautiful Presentation
Want to impress your guests? Try:
- A dusting of powdered sugar for an elegant touch.
- Edible gold leaf or glitter for a luxurious finish.
- A chocolate drizzle or fresh raspberries to enhance flavor.
By following these expert tips, you’ll master the art of Red Velvet Molten Lava Cupcakes, making them even more delicious and visually stunning!

Suggestions
Red Velvet Molten Lava Cupcakes are already an irresistible treat, but there are many ways to customize them to suit different preferences and occasions. Whether you want to adapt the recipe to a specific dietary need or add a creative twist, here are some suggestions to elevate these cupcakes even further!
1. Flavor Variations
If you want to bring a unique touch to these cupcakes, try these delicious variations:
- White Chocolate Red Velvet Cupcakes – Swap the dark chocolate filling for a creamy white chocolate ganache for a milder, sweeter taste.
- Chocolate Hazelnut Version – Add a spoonful of hazelnut spread or praline paste to the filling for a richer, nutty flavor.
- Spiced Red Velvet Cupcakes – A pinch of cinnamon or cayenne pepper enhances the chocolate with a subtle warmth.
2. Dairy-Free or Gluten-Free Options
For a more inclusive dessert, here are some adjustments:
- Dairy-Free – Replace butter with plant-based margarine and use coconut or almond cream instead of heavy cream.
- Gluten-Free – Use a gluten-free flour blend instead of regular flour. Ensure all ingredients, including cocoa powder and baking powder, are certified gluten-free.
3. Festive Cupcakes for Special Occasions
These cupcakes are perfect for various celebrations. Here’s how to make them even more special:
- Valentine’s Day – Top with fresh strawberries and a drizzle of melted chocolate.
- Birthdays – Add colorful sprinkles or whipped cream for a fun, festive look.
- Christmas – Sprinkle with powdered sugar and crushed peppermint for a winter wonderland effect.
4. Delicious Pairings
To take your cupcakes to the next level, serve them with:
- A scoop of vanilla or caramel ice cream.
- A drizzle of warm chocolate sauce or berry coulis for a sweet-tart contrast.
- A warm beverage like spiced hot chocolate or a creamy latte to enhance the cocoa notes.
With these suggestions, you can turn your Red Velvet Molten Lava Cupcakes into a personalized, unforgettable dessert!

FAQ
Still have questions about making or storing these cupcakes? Here are answers to the most common queries to ensure your recipe turns out perfectly!
1. Can I prepare the batter in advance?
Yes! You can prepare the batter and store it in the refrigerator for up to 24 hours before baking. Be sure to cover the bowl to prevent it from drying out.
2. How do I know when my cupcakes are done?
The key is to bake them just enough so that the top is set, but the center remains gooey. The edges should be slightly firm, but the middle should be soft and slightly jiggly.
3. Can I use milk chocolate instead of dark chocolate?
Yes, but milk chocolate is sweeter and has more fat, which may make the filling less fluid. For a milder taste, try a blend of dark and milk chocolate.
4. How do I reheat these cupcakes?
If you’ve made them ahead of time, here’s how to warm them up:
- Microwave – Heat for 10 to 15 seconds to restore the molten center.
- Oven – Warm at 300°F (150°C) for 3 to 5 minutes.
5. Can I freeze these cupcakes?
Yes! Let them cool completely, then wrap them tightly in plastic wrap before placing them in a freezer-safe bag. They’ll keep for up to 3 months. When ready to enjoy, thaw them in the fridge and gently reheat.
6. Why is my lava center too thick?
If your filling isn’t as gooey as it should be, it might be because:
- Your chocolate hardened too much before baking. Try softening it slightly before adding it to the batter.
- You used a chocolate with too little cocoa. Aim for at least 60% cocoa content for best results.
7. Can I make this recipe without eggs?
Yes! Replace each egg with unsweetened applesauce, yogurt, or a flaxseed mixture (1 tbsp ground flaxseeds + 3 tbsp water per egg) for a plant-based alternative.
8. How long can I store them at room temperature?
They’re best enjoyed the same day, but you can keep them in an airtight container at room temperature for up to 24 hours.

Conclusion
Red Velvet Molten Lava Cupcakes are a true explosion of flavor and texture—perfect for chocolate lovers and dessert enthusiasts alike. With their irresistibly gooey center and rich red velvet hue, they are not only delicious but also visually stunning, making them the ideal treat to impress guests at a dinner party or special occasion.
This dessert may seem sophisticated, but by following the detailed instructions and expert tips in this article, you’ll be able to bake cupcakes that look and taste like they came from a professional bakery!
What We Covered:
✅ Essential ingredients and tools to make these delightful cupcakes.
✅ Step-by-step instructions and precise measurements to guarantee success.
✅ Serving and storage recommendations to keep your cupcakes fresh and delicious.
✅ Common mistakes to avoid so you can perfect your recipe.
✅ Tips and creative variations to suit different tastes and dietary needs.
✅ Exciting serving ideas to elevate your cupcakes even further.
✅ FAQs answered to help you troubleshoot any baking issues.
Now It’s Your Turn!
The only thing left to do is grab your apron and start baking these Red Velvet Molten Lava Cupcakes! 😍 Whether for a celebration, a romantic evening, or just to treat yourself, this recipe is sure to become a favorite.
If you try this recipe, share your experience in the comments or post a photo! Did you try a unique variation? Do you have a secret ingredient that makes your cupcakes even better? 💬
Thank you for joining me on this delicious adventure! See you soon for another sweet and satisfying recipe.