Chocolate Bonbons Mini-Cakes – A Bite-Sized Delight

Chocolate Bonbons Mini-Cakes are the perfect fusion of rich, velvety chocolate and the delicate texture of a mini cake. These bite-sized treats offer a decadent experience, whether you’re indulging in a midday snack, impressing guests at a gathering, or making a sweet homemade gift. The best part? They’re easy to prepare, customizable, and require simple pantry ingredients.
These mini cakes mimic the luxurious appeal of chocolate bonbons, with a soft, moist interior and a slightly firm exterior. Unlike traditional bonbons that feature a hard shell, these mini cakes deliver a melt-in-your-mouth sensation that’s sure to satisfy any chocolate lover. You can also enhance them with various flavors like vanilla, coffee, or even nutty undertones.
What You’ll Need to make Chocolate Bonbons Mini-Cakes
Before diving into the recipe, let’s go over the essential ingredients and tools required to make Chocolate Bonbons Mini-Cakes. Having everything prepared in advance will make the process seamless and enjoyable.
Ingredients
Here’s what you’ll need to make approximately 12 mini cakes:
- All-purpose flour – 1 cup (120g), for a soft and light texture.
- Unsweetened cocoa powder – ¼ cup (25g), for a deep chocolate flavor.
- Granulated sugar – ½ cup (100g), to add the perfect level of sweetness.
- Eggs – 2 large, at room temperature, for structure and moisture.
- Butter – ½ cup (113g), melted, for richness.
- Milk – ⅓ cup (80ml), to keep the cakes tender.
- Baking powder – 1 teaspoon, for a light rise.
- Salt – ¼ teaspoon, to balance the sweetness.
- Vanilla extract – 1 teaspoon, for a hint of warmth.
- Chocolate chips – ½ cup (90g), for added gooeyness.
Tools Required
- Mixing bowls
- Whisk or hand mixer
- Mini cake or muffin pan
- Silicone spatula
- Measuring cups and spoons
- Wire rack for cooling

How to Make Chocolate Bonbons Mini-Cakes
Making these Chocolate Bonbons Mini-Cakes is straightforward and rewarding. Follow these step-by-step instructions to ensure your mini cakes come out moist, fluffy, and packed with rich chocolate flavor.
Step 1: Preheat and Prepare
- Preheat your oven to 350°F (175°C) to ensure even baking.
- Lightly grease a mini cake or muffin pan with butter or non-stick spray to prevent sticking. You can also use mini cupcake liners for easy removal.
Step 2: Mix the Dry Ingredients
- In a large mixing bowl, sift together flour (1 cup), cocoa powder (¼ cup), baking powder (1 teaspoon), and salt (¼ teaspoon).
- Whisk the ingredients well to ensure they are evenly distributed and free of lumps. This helps create a light and uniform texture.
Step 3: Prepare the Wet Ingredients
- In a separate bowl, beat 2 eggs until slightly frothy.
- Add sugar (½ cup) and whisk until the mixture turns pale and slightly thick.
- Pour in the melted butter (½ cup) and stir until fully incorporated.
- Mix in milk (⅓ cup) and vanilla extract (1 teaspoon) for added moisture and flavor.
Step 4: Combine Wet and Dry Ingredients
- Gradually fold the dry ingredients into the wet mixture, stirring gently to avoid overmixing. Overmixing can make the cakes dense instead of light and fluffy.
- Once the batter is smooth and free of dry streaks, gently fold in chocolate chips (½ cup) for extra richness.
Step 5: Fill the Mini Cake Pan
- Use a spoon or small scoop to fill each cavity of the mini cake pan, filling about ¾ full to allow room for rising.
- Tap the pan lightly on the counter to remove air bubbles and ensure even baking.
Step 6: Bake to Perfection
- Place the pan in the preheated oven and bake for 12-15 minutes.
- Check for doneness by inserting a toothpick into the center of a cake. If it comes out clean or with a few moist crumbs, they’re ready.
- Let the cakes cool in the pan for 5 minutes, then transfer them to a wire rack to cool completely.
Optional: Add a Finishing Touch
- Dust with cocoa powder or powdered sugar for an elegant look.
- Drizzle with melted chocolate or caramel for extra indulgence.
- Dip in chocolate ganache for a glossy, bonbon-like finish.

Serving and Storage Tips for Chocolate Bonbons Mini-Cakes
How to Serve Chocolate Bonbons Mini-Cakes
These mini cakes are versatile and can be served in different ways depending on the occasion:
- Casual Treat: Enjoy them warm with a glass of milk or a cup of coffee.
- Dessert Platter: Arrange them on a serving tray with fresh berries and whipped cream for an elegant dessert presentation.
- Party Favor: Wrap them individually in small gift boxes for a homemade treat to share.
- Layered Delight: Slice them in half and spread a layer of Nutella, peanut butter, or fruit jam for a filled version.
How to Store Chocolate Bonbons Mini-Cakes
To keep your mini cakes fresh and delicious, follow these storage tips:
At Room Temperature (Best for 2-3 Days)
- Store them in an airtight container at room temperature for up to 3 days.
- Keep them in a cool, dry place away from direct sunlight to prevent melting or drying out.
In the Refrigerator (Up to 5 Days)
- If you need to store them longer, place the mini cakes in an airtight container and refrigerate for up to 5 days.
- Let them sit at room temperature for 10-15 minutes before serving for the best texture.
Freezing (Up to 3 Months)
- Place the cooled mini cakes on a baking sheet and freeze for 1-2 hours to prevent sticking.
- Transfer them to a freezer-safe bag or container, labeling the date.
- Thaw at room temperature for about 30 minutes, or microwave for 10-15 seconds for a warm treat.
By following these serving and storage tips, you can enjoy your Chocolate Bonbons Mini-Cakes anytime with their perfect texture and flavor intact.

Mistakes to Avoid for Chocolate Bonbons Mini-Cakes
Even though Chocolate Bonbons Mini-Cakes are relatively simple to make, a few common mistakes can affect the final result. Here’s what to watch out for to ensure your mini cakes turn out soft, moist, and delicious every time.
1. Overmixing the Batter
One of the biggest mistakes when making cakes is overmixing the batter. While it’s important to fully combine the wet and dry ingredients, excessive stirring can develop too much gluten, resulting in dense and chewy mini cakes instead of light and fluffy ones. To avoid this, gently fold the ingredients together just until no dry streaks remain.
2. Skipping the Sifting Step
Skipping the step of sifting the dry ingredients might seem like a time-saver, but it can lead to lumps in the batter. Cocoa powder, in particular, tends to form clumps, which can create dry pockets in your mini cakes. Always sift your flour and cocoa powder to ensure a smooth and even texture.
3. Using Cold Ingredients
Cold eggs, butter, or milk can prevent your ingredients from blending properly, leading to an uneven texture. Always use room temperature ingredients to create a batter that’s smooth and well-incorporated. If you forget to take your eggs out ahead of time, submerge them in warm water for a few minutes to bring them to room temperature quickly.
4. Overfilling the Mini Cake Pan
It’s tempting to fill the mini cake cavities to the top, but this can cause the batter to overflow and create uneven shapes. Always fill each cavity ¾ full to allow room for the cakes to rise evenly.
5. Overbaking the Mini Cakes
Mini cakes bake much faster than regular-sized cakes, and even a few extra minutes in the oven can dry them out. Check for doneness at the 12-minute mark by inserting a toothpick into the center. If it comes out with a few moist crumbs, they’re done. If it comes out wet, bake for another 1-2 minutes and test again.
6. Not Letting the Cakes Cool Properly
Removing the mini cakes from the pan too soon can cause them to break apart, while leaving them in the pan too long can trap steam and make them soggy. Let them cool in the pan for 5 minutes, then transfer them to a wire rack to finish cooling.
7. Storing Them Incorrectly
Leaving mini cakes uncovered on the counter can cause them to dry out quickly. Always store them in an airtight container to maintain their moisture and freshness.
Avoiding these mistakes will ensure that your Chocolate Bonbons Mini-Cakes turn out soft, flavorful, and perfectly baked every time!

Tips and Tricks
Now that you know what to avoid, here are some expert tips to take your Chocolate Bonbons Mini-Cakes to the next level.
1. Enhance the Chocolate Flavor
For an even richer chocolate experience, use high-quality cocoa powder and consider adding a teaspoon of instant espresso powder to the batter. The coffee flavor won’t be noticeable, but it will intensify the depth of the chocolate.
2. Add a Surprise Filling
For an extra indulgent touch, try filling the center of each mini cake with something special:
- Nutella or peanut butter for a creamy surprise.
- Chocolate ganache for a molten effect.
- Fruit jam for a tangy contrast to the chocolate.
To do this, fill the mini cake cavities halfway, add a small spoonful of filling, then cover with more batter before baking.
3. Experiment with Different Coatings
Once your mini cakes are baked and cooled, you can enhance their appearance and flavor with different coatings:
- Chocolate Dip: Melt dark or milk chocolate and dip each mini cake halfway for a glossy, bonbon-like finish.
- Cocoa Powder Dusting: For a classic truffle look, roll the mini cakes in unsweetened cocoa powder.
- Powdered Sugar: A light dusting of powdered sugar adds an elegant touch.
4. Use Silicone Molds for Easy Removal
If you often struggle with cakes sticking to the pan, silicone mini cake molds can be a game-changer. They allow for easy removal without the need for extra greasing.
5. Turn Them into Cake Pops
For a fun twist, insert lollipop sticks into each mini cake and dip them in melted chocolate to create mini chocolate cake pops. This makes them perfect for parties or gifting.
6. Adjust the Sweetness to Your Preference
If you prefer a less sweet dessert, reduce the sugar slightly or use dark chocolate chips instead of milk chocolate. For extra sweetness, drizzle with caramel or honey.
7. Serve Warm for a Melting Effect
To enjoy the ultimate chocolatey experience, microwave the mini cakes for 10-15 seconds before serving. This will soften the chocolate chips inside, creating a gooey, molten center.
By following these tips and tricks, you can customize your Chocolate Bonbons Mini-Cakes to suit your taste and make them truly irresistible!

Suggestions
Chocolate Bonbons Mini-Cakes are already delicious on their own, but there are plenty of ways to customize them based on your preferences and dietary needs. Whether you’re looking to add new flavors, make them healthier, or find creative ways to serve them, here are some great suggestions.
1. Flavor Variations
If you want to experiment with different flavors, here are some ideas to elevate your mini cakes:
- Orange Chocolate: Add 1 teaspoon of orange zest or a few drops of orange extract to the batter for a citrusy touch.
- Mint Chocolate: Mix in ½ teaspoon of peppermint extract for a refreshing twist.
- Coconut Delight: Replace ¼ cup of flour with shredded coconut and top with coconut flakes.
- Spiced Chocolate: Add a pinch of cinnamon and nutmeg for a warm, spiced flavor.
- Almond Bliss: Swap vanilla extract for almond extract and sprinkle sliced almonds on top before baking.
2. Healthier Alternatives
If you want a lighter version of these mini cakes, try these substitutions:
- Replace butter with applesauce: Use unsweetened applesauce instead of butter to cut down on fat and calories while keeping the cakes moist.
- Use whole wheat flour: Swap half of the all-purpose flour with whole wheat flour for added fiber.
- Reduce sugar: Lower the sugar by ¼ cup and rely on natural sweetness from ingredients like mashed bananas or honey.
- Dairy-free version: Use almond milk or oat milk instead of regular milk, and swap butter for coconut oil.
3. Serving Ideas
These mini cakes can be served in various creative ways:
- With Ice Cream: Pair them with vanilla or caramel ice cream for an indulgent dessert.
- Drizzled with Chocolate Sauce: Melt some dark chocolate and drizzle it over the mini cakes for an extra chocolaty touch.
- As a Layered Dessert: Slice the mini cakes in half and layer them with whipped cream and fresh berries for a mini trifle.
- With a Dusting of Powdered Sugar: A simple yet elegant way to serve them.
4. Gift-Worthy Presentation
Chocolate Bonbons Mini-Cakes make excellent gifts. Here’s how to package them beautifully:
- In a Decorative Box: Arrange them in a box with cupcake liners and tie it with a ribbon.
- Individually Wrapped: Wrap each mini cake in parchment paper and seal it with a sticker for a personal touch.
- In a Jar: Stack a few mini cakes in a mason jar and include a tag with a sweet message.
5. Festive Twists for Special Occasions
Want to make these mini cakes festive? Here are some fun ideas:
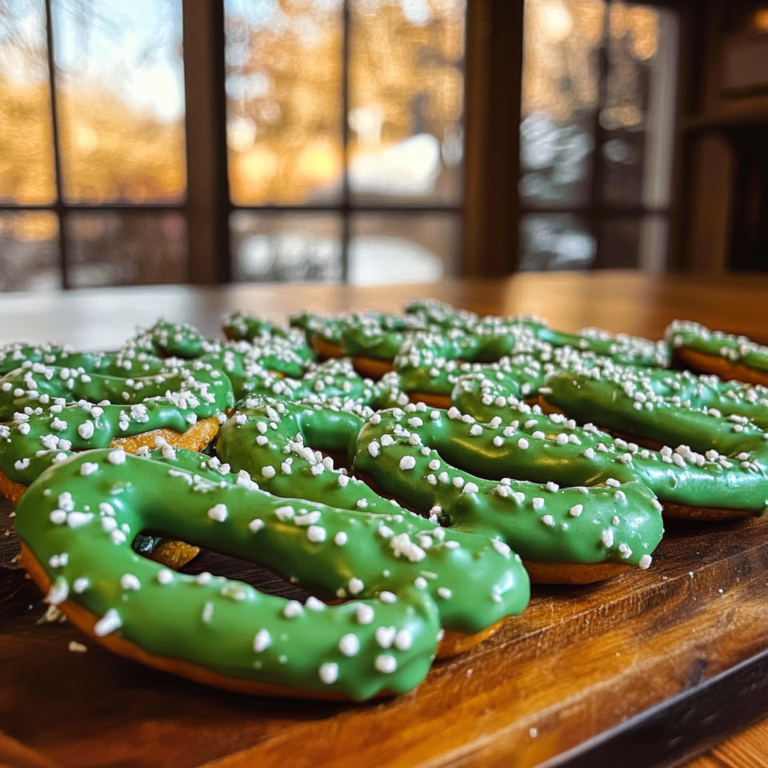
- Christmas Version: Add crushed candy canes on top and a sprinkle of edible glitter.
- Valentine’s Day Treat: Shape them into hearts using a silicone mold and drizzle with pink or white chocolate.
- Halloween Fun: Add orange and black sprinkles, or mix in some spooky-themed candy pieces.
With these creative suggestions, you can make Chocolate Bonbons Mini-Cakes perfect for any occasion and suited to different tastes!

FAQ
Here are some commonly asked questions about making Chocolate Bonbons Mini-Cakes, along with helpful answers to ensure your baking experience is smooth and enjoyable.
1. Can I make these mini cakes in advance?
Yes! These mini cakes can be made 1-2 days in advance and stored in an airtight container at room temperature. If you want to keep them longer, refrigerate them for up to 5 days or freeze them for up to 3 months.
2. Can I bake these in a regular cupcake pan instead of a mini cake mold?
Absolutely! If you don’t have a mini cake pan, you can use a regular muffin tin. However, the baking time will be slightly longer—15-18 minutes instead of the usual 12-14 minutes.
3. How do I make sure my mini cakes are soft and moist?
To keep your cakes soft and moist:
- Don’t overmix the batter.
- Use room temperature ingredients.
- Bake just until done—don’t overbake!
- Store them properly in an airtight container.
4. Can I make these mini cakes gluten-free?
Yes! You can replace the all-purpose flour with a 1:1 gluten-free flour blend. Just make sure it includes xanthan gum for the best texture.
5. How can I make them less sweet?
If you prefer a less sweet version, try these modifications:
- Reduce the sugar by ¼ cup.
- Use dark chocolate chips instead of milk chocolate.
- Add a pinch of salt to balance the sweetness.
6. What’s the best way to melt chocolate for dipping?
For smooth, glossy chocolate:
- Microwave Method: Heat the chocolate in 30-second intervals, stirring in between, until fully melted.
- Double Boiler Method: Place a heatproof bowl over a pot of simmering water and stir the chocolate until melted.
7. Can I add nuts or dried fruit to the batter?
Definitely! Chopped walnuts, pecans, or dried cherries are excellent mix-ins that add texture and flavor. Just be sure to fold them in gently at the end.
8. Can I turn these into a bigger cake instead of mini cakes?
Yes, you can bake this batter in a 9-inch round cake pan. Adjust the baking time to 25-30 minutes, and check with a toothpick for doneness.
9. What’s the best way to store leftovers?
Store mini cakes in an airtight container at:
- Room temperature for up to 2 days.
- Refrigerator for up to 5 days.
- Freezer for up to 3 months (wrap individually in plastic wrap).
10. Can I reheat them to make them taste fresh again?
Yes! Warm them in the microwave for 10-15 seconds to bring back their soft texture and enhance the chocolatey flavor.
Conclusion
Chocolate Bonbons Mini-Cakes are the perfect bite-sized indulgence for any occasion. With their rich, chocolaty flavor and soft, moist texture, they are guaranteed to impress both casual snackers and dessert lovers alike. Whether you’re making them for a family gathering, gifting them to a friend, or simply treating yourself, these mini cakes are a fantastic way to enjoy the magic of chocolate in a small but satisfying form.
A Dessert for Every Occasion
One of the best things about these mini cakes is their versatility. You can customize them with different flavors, toppings, and fillings to match your preferences or suit the occasion. Want a more decadent version? Add a drizzle of melted dark chocolate. Prefer a lighter treat? Reduce the sugar and use a dairy-free alternative. They can be made elegant for a dinner party or fun and colorful for a kids’ celebration.
Why You Should Try This Recipe
- Easy to Make: The recipe is beginner-friendly, with simple ingredients and straightforward steps.
- Customizable: You can switch up flavors, add mix-ins, or change the toppings for endless variations.
- Perfect for Any Time: Whether it’s a snack, a party dessert, or a holiday treat, these mini cakes fit the bill.
- Great for Gifting: Their small size and beautiful presentation make them ideal for homemade gifts.
Final Thoughts
If you’ve never tried making Chocolate Bonbons Mini-Cakes before, now is the time! They’re fun to prepare, absolutely delicious, and sure to be a hit with family and friends. Follow the tips and tricks in this guide to ensure your mini cakes turn out perfectly every time.
Now, it’s your turn! Have you tried this recipe? What variations did you add? Let me know in the comments—I’d love to hear your creative takes on this delightful treat! 😊 🍫