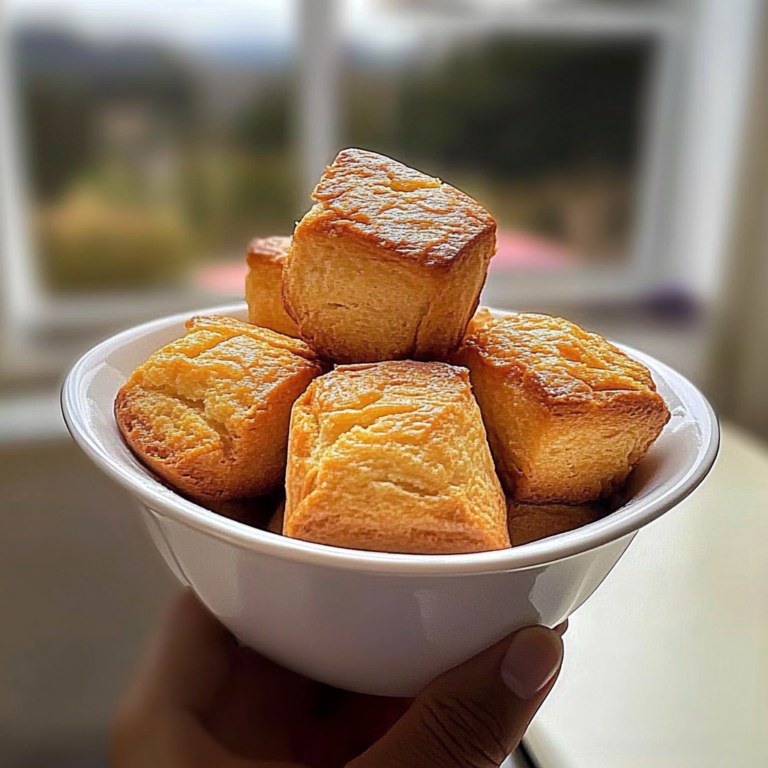
How to Make Irresistible Chocolate Hand Pies at Home

Imagine biting into a warm, flaky pastry that gives way to a rich, velvety chocolate filling—pure bliss, right? Chocolate hand pies offer this delightful experience in a convenient, portable form. These miniature pies are perfect for satisfying your sweet tooth, impressing guests at gatherings, or enjoying a cozy treat on a quiet evening.
Originating from the traditional concept of hand pies—small pastries filled with sweet or savory fillings—chocolate hand pies have become a favorite among dessert enthusiasts. Their appeal lies in the harmonious combination of a tender, buttery crust and a luscious chocolate center. Whether you’re a seasoned baker or a novice in the kitchen, crafting these delectable treats is both rewarding and enjoyable.
In this comprehensive guide, we’ll walk you through everything you need to know to create irresistible chocolate hand pies. From gathering the essential ingredients and tools to mastering the preparation process, we’ve got you covered. We’ll also share serving suggestions, storage tips, common pitfalls to avoid, and answers to frequently asked questions. By the end of this article, you’ll be well-equipped to bake these delightful pastries and perhaps even add your unique twist to the classic recipe.
What You’ll Need
Ingredients:
For the Chocolate Pie Dough:
- All-Purpose Flour: 2 and 1/4 cups (281g), spooned and leveled.
- Unsweetened Cocoa Powder: 1/4 cup (21g), natural or Dutch-process.
- Granulated Sugar: 2 tablespoons (24g).
- Salt: 1 teaspoon.
- Unsalted Butter: 1 cup (226g), very cold and cubed.
- Cold Milk or Heavy Cream: 1/2 cup (120ml), plus more as needed.
For the Chocolate Filling:
- Semi-Sweet Chocolate: 4 ounces (113g), coarsely chopped.
- Heavy Cream: 1/2 cup (120ml).
- Optional: 2 tablespoons (31g) creamy peanut butter for a nutty twist.
For Assembly:
- Egg Wash: 1 large egg beaten with 1 tablespoon (15ml) milk or heavy cream.
- Optional Topping: 2 tablespoons coarse sugar for added texture and sweetness.
Tools and Equipment:
- Food Processor: For combining the dough ingredients efficiently.
- Rolling Pin: To roll out the dough evenly.
- Cookie Cutter: A 3-inch cutter, any shape you prefer.
- Baking Sheets: Lined with parchment paper for easy cleanup.
- Pastry Brush: For applying the egg wash.
- Small Saucepan: To prepare the chocolate filling.
- Mixing Bowls: Various sizes for different mixing tasks.
- Plastic Wrap: For chilling the dough.
- Cooling Rack: To cool the pies evenly after baking.
Having these ingredients and tools ready will streamline the baking process, ensuring you can focus on creating the perfect chocolate hand pies. Remember, using high-quality chocolate and fresh dairy products will significantly enhance the flavor and texture of your pastries.

How to Make Irresistible Chocolate Hand Pies
Creating these delectable chocolate hand pies involves several key steps: preparing the chocolate pie dough, crafting the rich chocolate filling, assembling the pies, and baking them to perfection. Below is a detailed guide to each stage, complete with measurements and instructions.
Preparing the Chocolate Pie Dough:
- Combine Dry Ingredients: In a large food processor, add 2 and 1/4 cups (281g) of all-purpose flour, 1/4 cup (21g) of unsweetened cocoa powder, 2 tablespoons (24g) of granulated sugar, and 1 teaspoon of salt. Pulse several times to ensure the ingredients are well mixed.
- Incorporate Butter: Add 1 cup (226g) of very cold, cubed unsalted butter to the processor. Pulse 15-20 times until the mixture resembles coarse crumbs. If you don’t have a food processor, you can use a large bowl and a pastry cutter to achieve the same texture.
- Add Liquid: Gradually drizzle in 1/2 cup (120ml) of cold milk or heavy cream while pulsing the processor or stirring the mixture. Continue until the dough starts to come together. If the dough appears too dry, add an additional tablespoon of milk or cream. Be cautious not to overmix; the dough should be slightly shaggy yet cohesive.
- Chill the Dough: Divide the dough into two equal portions and shape each into a 1-inch thick disc. Wrap each disc tightly in plastic wrap and refrigerate for at least 2 hours, or up to 5 days. Chilling the dough helps relax the gluten and solidify the butter, resulting in a flakier crust.
Preparing the Chocolate Filling:
- Heat the Cream: In a small saucepan over medium heat, warm 1/2 cup (120ml) of heavy cream until it just begins to simmer. Avoid bringing it to a full boil.
- Melt the Chocolate: Place 4 ounces (113g) of coarsely chopped semi-sweet chocolate in a heatproof bowl. Pour the hot cream over the chocolate and let it sit for a minute to soften. Gently stir the mixture until the chocolate is fully melted and the filling is smooth. For a nutty variation, you can incorporate 2 tablespoons (31g) of creamy peanut butter into the mixture, stirring until well combined.
- Cool the Filling: Allow the chocolate filling to cool at room temperature. As it cools, it will thicken, making it easier to spoon into the dough rounds during assembly.
Assembling the Hand Pies:
- Roll Out the Dough: On a lightly floured surface, roll out one disc of chilled dough to approximately 1/8-inch thickness. Using a 3-inch cookie cutter of your preferred shape, cut out as many pieces as possible. Gather the scraps, re-roll, and continue cutting until all the dough is used. Repeat this process with the second disc of dough. You should have an even number of cutouts to form the tops and bottoms of the pies.
- Add the Filling: Place half of the dough cutouts onto a parchment-lined baking sheet. Spoon about 1 tablespoon of the cooled chocolate filling onto the center of each piece, ensuring you leave a border around the edges for sealing.
- Seal the Pies: Brush the edges of each filled dough piece with a small amount of water to help the top layer adhere. Place a second dough cutout over each filled piece, pressing the edges together gently. Use the tines of a fork to crimp and seal the edges securely. This step prevents the filling from leaking during baking.
- Apply Egg Wash: In a small bowl, beat 1 large egg with 1 tablespoon (15ml) of milk or heavy cream to create an egg wash. Brush the tops of each hand pie with this mixture to promote a golden, glossy finish. If desired, sprinkle a pinch of coarse sugar on top for added texture and sweetness.
- Vent the Pies: Using a sharp knife, cut a small slit or poke a few holes in the top of each pie to allow steam to escape during baking. This step helps maintain the pies’ shape and prevents them from becoming soggy.
Baking the Hand Pies:
- Preheat the Oven: Set your oven to 375°F (190°C) and allow it to fully preheat.
- Bake: Place the prepared baking sheet with the assembled hand pies into the preheated oven. Bake for approximately 15-18 minutes, or until the pies are puffed and the edges are set. Keep an eye on them to prevent overbaking, as oven temperatures can vary.
- Cool: Once baked, remove the pies from the oven and allow them to cool on the baking sheet for about 5 minutes. Then, transfer them to a wire cooling rack to cool completely. This ensures the crust maintains its flaky texture and the filling sets properly.
By following these detailed steps, you’ll create delightful chocolate hand pies with a tender, flaky crust and a rich, indulgent filling. These treats are sure to impress and satisfy any chocolate lover’s cravings.

Serving and Storage Tips For Chocolate Hand Pies
Serving Suggestions:
- Temperature: Chocolate hand pies can be enjoyed warm or at room temperature. Serving them warm enhances the gooey texture of the chocolate filling, providing a comforting and indulgent experience.
- Accompaniments: Pair these pies with a scoop of vanilla ice cream or a dollop of freshly whipped cream to balance the rich chocolate flavor. A drizzle of caramel or raspberry sauce can also add a delightful contrast.
- Presentation: For a decorative touch, dust the cooled pies with powdered sugar or cocoa powder. Alternatively, drizzle melted white or dark chocolate over the tops in a zigzag pattern for an elegant finish.
Storage Guidelines:
- Room Temperature: Once completely cooled, store the hand pies in an airtight container at room temperature. They will remain fresh for up to 2 days. Ensure they are kept in a cool, dry place away from direct sunlight and heat sources to prevent the chocolate from melting.
- Refrigeration: While refrigeration can extend the shelf life of baked goods, it may cause the crust to become sog

Mistakes to Avoid
Even the best bakers can make mistakes when preparing chocolate hand pies. Understanding common pitfalls can help ensure your pies turn out perfectly every time. Here are some of the most frequent errors and how to avoid them.
1. Not Chilling the Dough Properly
One of the biggest mistakes is skipping or shortening the dough chilling process. Cold butter is essential for achieving a flaky, tender crust. If the butter softens too much before baking, the dough can become sticky and difficult to work with, resulting in tough or dense hand pies.
How to Avoid It:
- Refrigerate the dough for at least 2 hours before rolling it out.
- If your kitchen is warm, place the dough in the freezer for 15 minutes before rolling.
- Always work quickly, and if the dough becomes too soft while shaping the pies, refrigerate it again before baking.
2. Overworking the Dough
Overmixing or kneading the dough too much develops the gluten, which can make the crust tough instead of light and flaky.
How to Avoid It:
- Mix the dough only until the ingredients come together.
- When rolling, use gentle pressure and avoid stretching the dough, which can cause it to shrink when baked.
3. Rolling the Dough Too Thin or Too Thick
If the dough is too thin, the pies will be fragile and might break or leak during baking. If it’s too thick, the crust can overwhelm the filling and feel dense.
How to Avoid It:
- Aim for a thickness of about 1/8 inch (3mm).
- Use a ruler if needed to maintain consistency.
4. Not Sealing the Edges Properly
If the pies aren’t sealed well, the chocolate filling can leak out during baking, leaving a mess on your baking sheet.
How to Avoid It:
- Brush the edges of the dough with water or beaten egg before sealing.
- Use a fork to crimp the edges firmly and ensure a tight seal.
5. Overfilling the Pies
Too much chocolate filling can cause the pies to burst open while baking.
How to Avoid It:
- Stick to about 1 tablespoon of filling per pie.
- If you want more chocolate flavor, consider drizzling melted chocolate on top after baking instead.
6. Skipping the Venting Step
Pies that are not vented properly may puff up unevenly or even burst open.
How to Avoid It:
- Use a sharp knife or toothpick to cut small slits on the top before baking.
- This allows steam to escape and prevents soggy crusts.
7. Not Using an Egg Wash
An egg wash gives the pies a golden, glossy finish. Without it, the pies can look dull and dry.
How to Avoid It:
- Brush a mixture of 1 egg + 1 tablespoon of milk or cream over the tops before baking.
8. Baking at the Wrong Temperature
An oven that’s too hot or too cool can affect the final texture of the pies.
How to Avoid It:
- Always preheat your oven to 375°F (190°C) before baking.
- Use an oven thermometer to ensure accuracy.
By keeping these common mistakes in mind, you’ll be well on your way to making perfect chocolate hand pies every time!

Tips and Tricks for Chocolate Hand Pies
Now that you know what mistakes to avoid, here are some additional tips and tricks to make your chocolate hand pies even better.
1. Use High-Quality Chocolate
The quality of your chocolate makes a huge difference in flavor. Choose a good-quality semi-sweet or dark chocolate (at least 60% cocoa) for a richer taste.
2. Try Different Fillings
While chocolate is the star ingredient, you can mix things up by adding:
- A spoonful of peanut butter, Nutella, or almond butter for a nutty twist.
- A few mini marshmallows for a s’mores-style pie.
- Chopped hazelnuts, almonds, or coconut flakes for added crunch.
3. Make Them Ahead of Time
Chocolate hand pies are perfect for meal prep and can be made ahead.
- Refrigerate unbaked pies for up to 2 days before baking.
- Freeze them for up to 3 months and bake straight from frozen, adding 3-5 minutes to the baking time.
4. Customize the Shape
Instead of classic circles, try:
- Heart-shaped pies for Valentine’s Day.
- Star-shaped pies for festive occasions.
- Mini squares or rectangles for a pop-tart-style treat.
5. Serve with Fun Dips
Enhance your pies by serving them with:
- Warm chocolate ganache for extra indulgence.
- A drizzle of salted caramel sauce for a sweet-salty combo.
- Berry compote for a fruity contrast.
6. Reheat for Maximum Enjoyment
If your hand pies have been sitting out, warm them up in a 350°F (175°C) oven for 5 minutes or in an air fryer for a crispy texture.
By using these tips and tricks, you can take your chocolate hand pies to the next level and impress your friends and family with bakery-quality results.

Suggestions
Chocolate hand pies are already a delicious treat, but there are plenty of ways to customize them to suit different tastes, dietary needs, and occasions. Below, you’ll find creative ideas to take your hand pies to the next level.
1. Alternative Fillings for Different Flavors
While classic chocolate is always a winner, you can experiment with different fillings for variety. Try these delicious options:
- Chocolate & Raspberry – Add a teaspoon of raspberry jam along with the chocolate for a fruity contrast.
- Salted Caramel & Chocolate – A small drizzle of thick caramel inside adds a delightful sweet-salty combo.
- Mint Chocolate – Add a few drops of peppermint extract to the chocolate filling for a refreshing twist.
- Cookies & Cream – Mix crushed chocolate cookies with melted white chocolate for a creamy, crunchy filling.
- Espresso Chocolate – Stir a pinch of instant coffee or espresso powder into the chocolate for a bold, mocha flavor.
One bite of this sweet classic, and you’ll be hooked!
2. Making Them Healthier
Want a slightly healthier version? Try these swaps:
- Use whole wheat pastry flour instead of all-purpose flour for added fiber.
- Replace some of the butter with Greek yogurt to reduce fat while keeping the dough tender.
- Opt for dark chocolate (70% or higher) instead of milk chocolate for more antioxidants and less sugar.
- Reduce the sugar in the dough slightly to make the hand pies less sweet and let the chocolate shine.
3. Fun Shapes and Designs
Make your chocolate hand pies visually appealing by using creative shapes:
- Stars and Hearts – Perfect for special occasions like Valentine’s Day or birthdays.
- Mini Rectangles – Resembling homemade Pop-Tarts for a nostalgic feel.
- Pumpkins or Bats – Great for Halloween-themed treats.
- Christmas Trees or Snowflakes – Festive shapes for the holiday season.
Use cookie cutters to create uniform shapes and impress guests with decorative pastries.
4. Serving Ideas
Chocolate hand pies taste amazing on their own, but you can enhance the experience with:
- Vanilla Ice Cream – Serve warm pies with a scoop of vanilla ice cream for an irresistible dessert.
- Powdered Sugar Dusting – Lightly dust the pies with powdered sugar for an elegant finish.
- Whipped Cream & Berries – Fresh berries with homemade whipped cream balance the richness of the chocolate.
- Chocolate Drizzle – Melt some extra chocolate and drizzle it over the top for extra indulgence.
5. Party and Gift Ideas
Chocolate hand pies make great gifts or party treats! Here’s how:
- For a party: Arrange them on a dessert table with different dipping sauces like chocolate ganache, fruit compotes, or caramel.
- For gifting: Wrap individual hand pies in parchment paper, tie with twine, and place them in a decorative box for a homemade gift.
- For kids: Let children decorate their own hand pies with sprinkles, edible glitter, or colored icing.
By customizing your chocolate hand pies with these suggestions, you can create a unique treat that everyone will love!

FAQ (Frequently Asked Questions)
Many home bakers have common questions about making chocolate hand pies. Here are answers to help you perfect this delicious treat.
1. Can I use store-bought pie crust?
Yes! While homemade pie dough gives the best flavor and texture, store-bought pie crust is a great time-saving alternative. Just make sure to let it come to room temperature before rolling it out.
Make your dessert table shine with this showstopping recipe.
2. How do I keep the filling from leaking out?
To prevent leaks:
- Don’t overfill—use about 1 tablespoon of filling per pie.
- Seal the edges well by brushing with water or beaten egg before pressing with a fork.
- Cut small steam vents on top of each pie to release pressure during baking.
3. Can I make these hand pies ahead of time?
Absolutely! You can:
- Refrigerate unbaked pies for up to 2 days before baking.
- Freeze unbaked hand pies for up to 3 months. Bake straight from frozen, adding 3-5 extra minutes to the bake time.
- Store baked hand pies in an airtight container at room temperature for 2 days or refrigerate for up to 5 days.
4. What if I don’t have a rolling pin?
No rolling pin? No problem! Use a clean wine bottle or a tall drinking glass to roll out your dough evenly.
5. Can I bake these in an air fryer?
Yes! Air fryers make a crispier version of chocolate hand pies.
- Preheat the air fryer to 350°F (175°C).
- Place the pies in a single layer and air fry for 8-10 minutes until golden brown.
6. What type of chocolate works best?
Semi-sweet or dark chocolate with at least 60% cocoa is ideal for a rich flavor. Avoid using chocolate chips, as they contain stabilizers that prevent smooth melting.
7. Can I make these gluten-free?
Yes! Use a gluten-free 1:1 flour blend instead of regular flour. Also, check that your chocolate is gluten-free.
8. Can I fry these instead of baking?
Yes! For a fried version:
- Heat 2 inches of oil in a pan to 350°F (175°C).
- Fry the pies for 2-3 minutes per side until golden brown.
- Drain on paper towels and dust with powdered sugar.
9. How do I make them dairy-free?
To make dairy-free chocolate hand pies:
- Use vegan butter or coconut oil instead of regular butter.
- Choose dairy-free dark chocolate for the filling.
- Use non-dairy milk (like almond or oat milk) in the egg wash or dough.
10. Can I add nuts or other mix-ins?
Yes! Try adding:
- Chopped hazelnuts, pecans, or almonds for crunch.
- A sprinkle of sea salt for contrast.
- A pinch of cinnamon or chili powder for a unique flavor twist.
By following these tips and answers, you’ll be able to create the best chocolate hand pies every time!

Conclusion
Embarking on the journey of crafting irresistible chocolate hand pies is a delightful endeavor that combines the art of baking with the joy of indulgence. These delectable treats, with their flaky crusts enveloping rich, velvety chocolate fillings, are sure to become a favorite in your dessert repertoire.
Satisfy your sweet tooth with this indulgent dessert.
A Versatile Delight
One of the most appealing aspects of chocolate hand pies is their versatility. Whether you’re preparing them for a festive gathering, a cozy family dessert, or as a thoughtful homemade gift, they adapt beautifully to any occasion. Their portable nature makes them an excellent choice for picnics, potlucks, or as a sweet surprise in lunchboxes.
Customization to Suit Every Palate
The basic recipe serves as a canvas for your culinary creativity. You can experiment with various fillings, such as adding a spoonful of raspberry jam for a fruity twist or a sprinkle of sea salt to enhance the chocolate’s depth. For those with dietary preferences, adjustments like using dairy-free chocolate or whole wheat pastry flour can make these treats more aligned with personal health goals without compromising on flavor.
Tips for Perfection
To ensure your chocolate hand pies turn out perfectly every time, consider the following tips:
- Dough Handling: Keep your ingredients, especially the butter, as cold as possible to achieve a flaky crust. Chilling the dough before rolling it out helps in maintaining its structure and prevents shrinkage during baking.
- Sealing the Edges: Prevent filling leakage by brushing the edges with a beaten egg before sealing and crimping with a fork. This not only secures the filling but also adds a decorative touch.
- Baking Evenly: Arrange the pies evenly spaced on the baking sheet to allow for proper air circulation, ensuring they bake uniformly to a golden brown.
Sharing the Joy
Baking these hand pies can be a fun group activity. Involve family members or friends in the process, from rolling out the dough to customizing their own fillings. This not only makes the baking process enjoyable but also creates cherished memories.
Final Thoughts
In a world where convenience often trumps tradition, taking the time to bake chocolate hand pies from scratch is a rewarding experience. The combination of simple ingredients transformed into a decadent treat embodies the magic of home baking. So, gather your ingredients, preheat your oven, and indulge in the delightful process of creating these irresistible chocolate hand pies. Your taste buds—and those of your loved ones—will thank you.